FaSTTUBe CAN HAL Abstraction Layer
This repository contains an abstraction layer to provide a simplified & unified interface to the STM32 bxCAN and FDCAN peripherals.
Installation
Simply add the repository to your Core/Lib directory. You can also add it as a
git submodule:
mkdir -p Core/Lib
cd Core/Lib
git submodule add ssh://git@git.fasttube.de:313/FaSTTUBe/can-halal.git
The library needs to be told what STM family you're using, so make sure one of
the following symbols is defined when can-halal.c is compiled or can-halal.h
is included:
STM32F3STM32H7STM32F0
When using the FDCAN peripheral (H7 series), you also need to define
FTCAN_NUM_FILTERS (and set it to the value of "Std Filters Nbr" you configured
in your .ioc).
If you use
VSCode with the stm-32-for-vscode extension,
you can add these definitions in the STM32-for-VSCode-config.yaml file, e.g.:
# Compiler definitions. The -D prefix for the compiler will be automatically added.
cDefinitions:
  - STM32H7
  - FTCAN_NUM_FILTERS=32
Usage
- Include
can-halal.h - Call
ftcan_init()with the appropriate handle - Call
ftcan_add_filter()with all your filters - To transmit messages, call
ftcan_transmit() - When a message is received,
ftcan_msg_received_cb()is called. It has a default empty implementation, which you can simply override.
Enabling CAN in STM32CubeMX
This isn't specific to can-halal, but for completeness sake is included here.
bxCAN (e.g. STM32F3xx)
- Enable the CAN peripheral
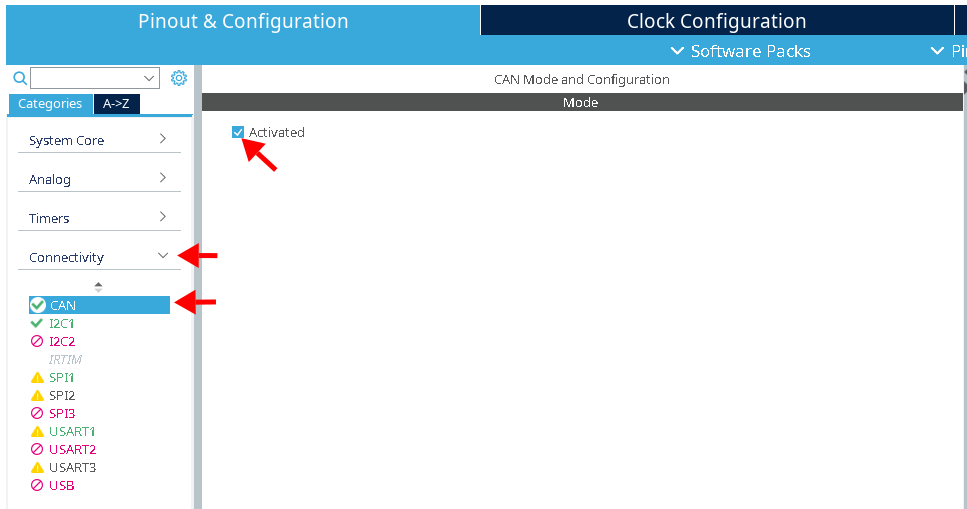
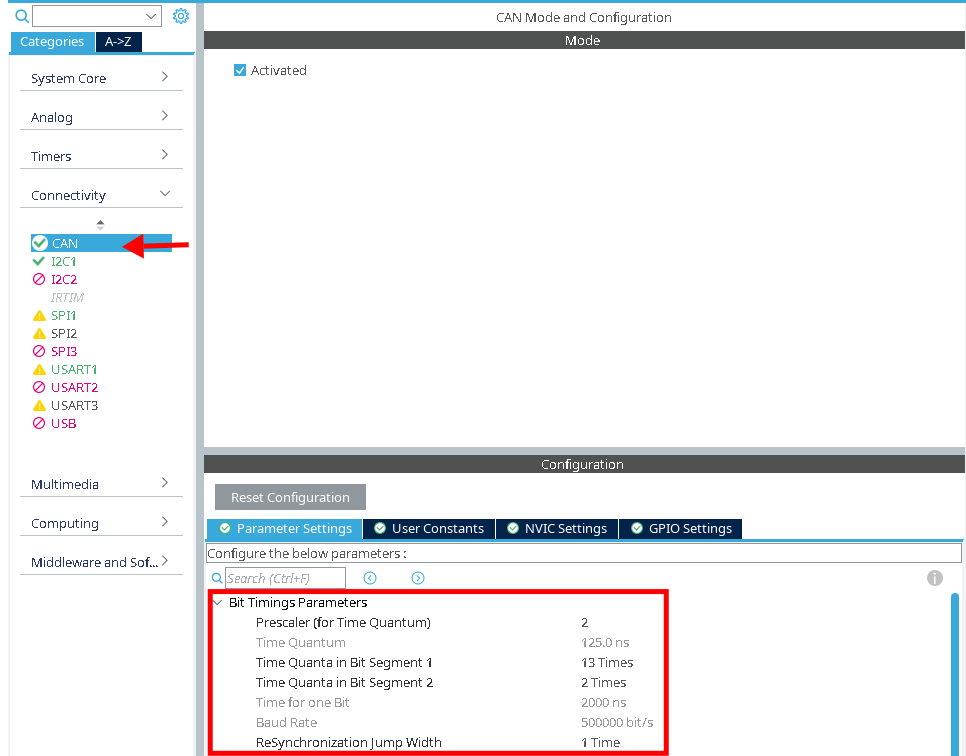
- Setup the bit timings.
Note: the baud rate depends on your system clock, so make sure that is setup correctly first!
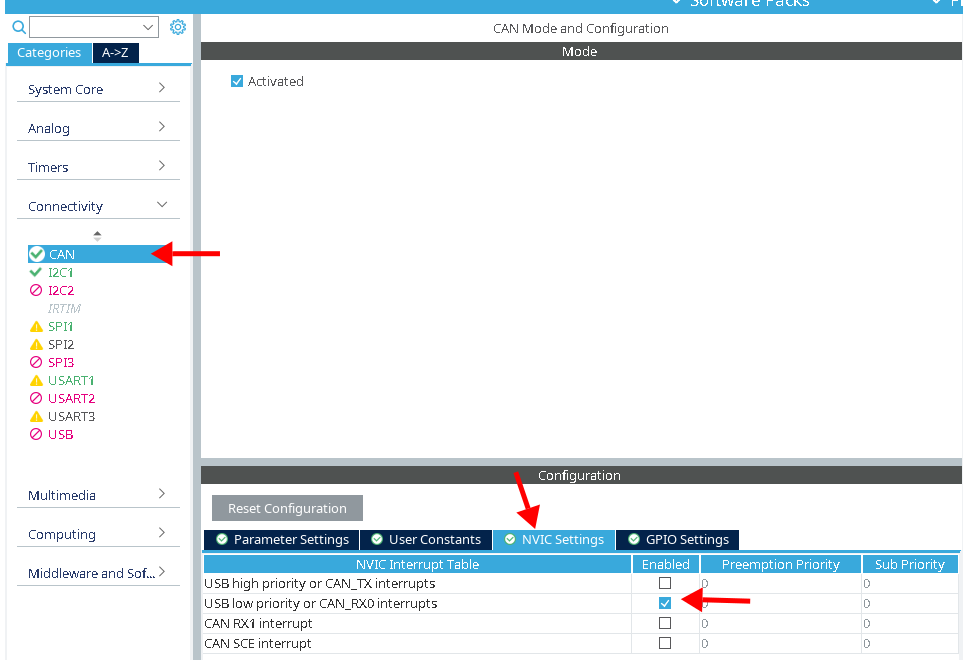
- Make sure the CAN_RX0 interrupt is enabled


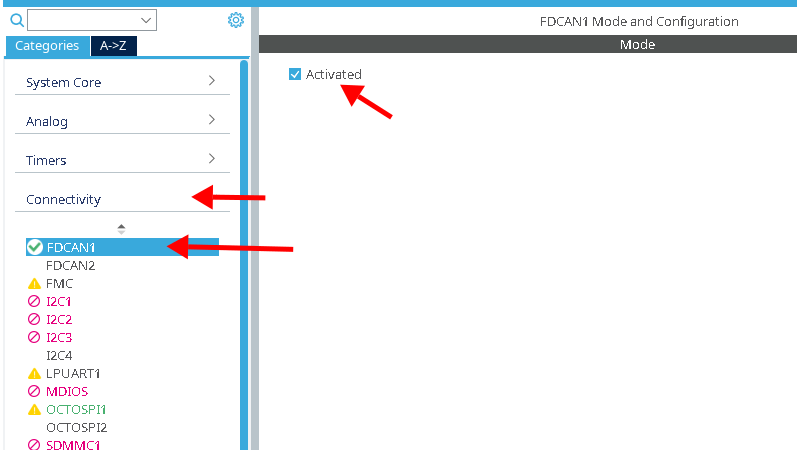
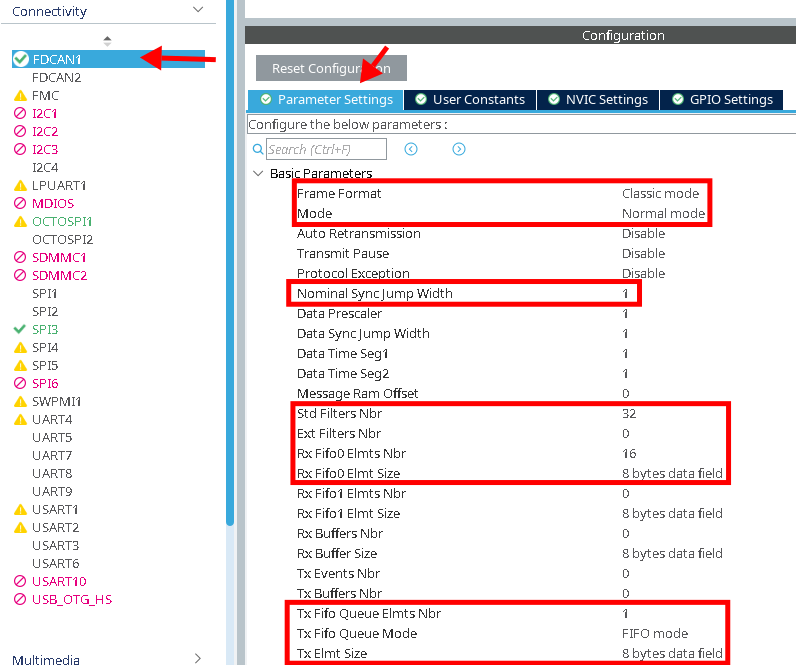
FDCAN (e.g. STM32H7xx)
- Enable the CAN peripheral
- Setup the frame format, nominal SJW, filters, and FIFOs. The numbers for
filters/FIFOs in the screenshot are examples.
Note: You need to tellcan-halalabout the number of filters by definingFTCAN_NUM_FILTERS(see above).
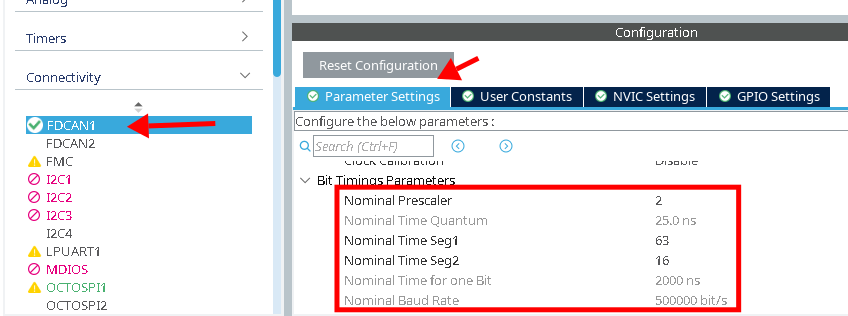
- Setup the bit timings. We only use CAN in
classic mode, not FD mode, so we only need to worry about the nominal bit
timings
Note: the baud rate depends on your system clock, so make sure that is setup correctly first!
- Make sure the interrupts are enabled


